Menu

FuseBeads Hub Β© 2026

Fuse Bead Phone Case: DIY Decor & Accessories Guide

Learn how to decorate phone cases and tech accessories with fuse beads. Adhesion methods, design tips, and step-by-step tutorials for crafters.

Beginner5 min read read

Why Fuse Beads Belong on Your Phone Case

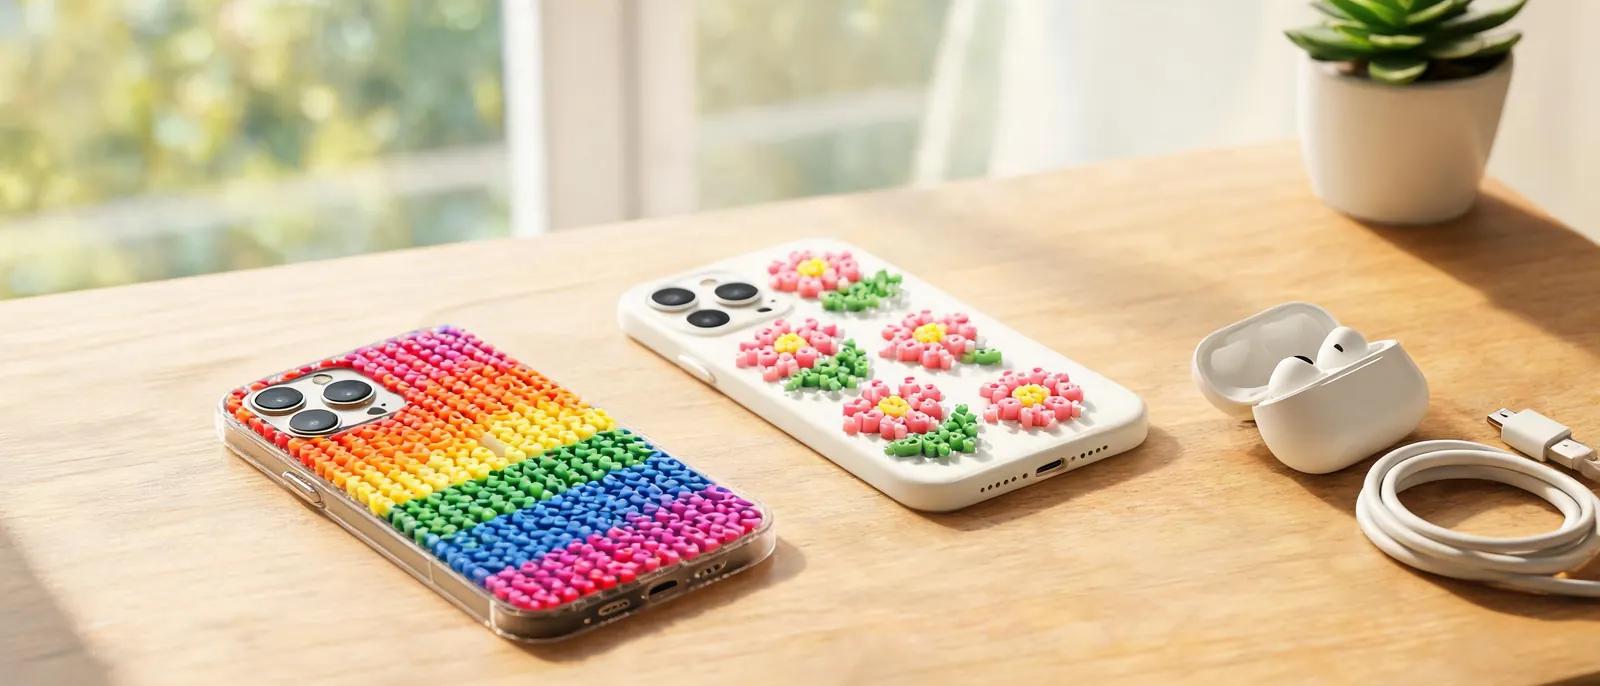
Fuse beads, also known as Perler or Hama beads, have long been a favorite for pixel art and keychains, but their flat, durable nature makes them surprisingly perfect for phone case decoration. Unlike stickers that peel or paint that chips, a well-made fuse bead design can withstand daily handling and give your phone a truly custom look. The key is understanding how to attach them securely without damaging your case or your phone. Many crafters start with fuse beads by making simple shapes like hearts, stars, or game characters. You can find plenty of inspiration in our cool ideas collection and animal designs to spark your creativity. Once you've mastered basic ironing, as covered in our how to iron fuse beads guide, you're ready to tackle phone accessories. The appeal of a fuse bead phone case goes beyond aesthetics. It's a conversation starter, a way to express your personality, and a practical project that uses up leftover beads from larger creations. Whether you want a subtle border of tiny beads around the camera cutout or a full pixel-art masterpiece on the back, the techniques in this article will help you achieve a result that lasts.

Materials and Tools You'll Need

Before you start, gather the right supplies. You'll need fuse beads in your chosen colors, a pegboard (square or shaped), ironing paper, an iron, and a phone case. For adhesion, you have several options: strong double-sided tape, E6000 or similar craft glue, or clear epoxy resin for a permanent, glossy finish. A pair of tweezers helps with precise bead placement, and a small file or sandpaper can smooth rough edges after ironing. Choosing the right phone case is crucial. Hard plastic cases work best because glue adheres more reliably than to silicone or leather. If you're using a clear case, you can even place the design inside for a floating effect. For a more integrated look, consider a case with a recessed back panel where the bead design can sit flush. For tools, a basic iron with adjustable temperature is fine, but a mini iron gives you more control for small designs. Our recommended tools guide covers everything from irons to bead organizers. If you're new to the craft, start with our beginners guide to build confidence before working on a phone case. Also, check out the color guide to plan your palette effectively.
Materials and Tools You'll Need

Designing Your Fuse Bead Phone Case Pattern

The design phase is where your phone case becomes unique. Start by measuring the available space on your case. Most standard cases have a flat back area of about 6x12 cm, but this varies. Use a pegboard to lay out your design, keeping in mind that the final ironed piece will be slightly smaller due to bead melting. For precise patterns, you can use our pattern generator to convert images into bead grids. When choosing a design, consider the scale. A full-coverage pixel art scene might be too busy for a small phone case. Instead, opt for a central motif like a character, logo, or abstract shape, and leave negative space around it. Borders made of single beads can frame the design elegantly. If you want to incorporate 3D elements, our 3D fuse bead tutorial shows how to create raised effects that add depth. Color contrast is key. Light beads on a dark case pop, while dark beads on a light case create a subtle, sophisticated look. Test your color combinations on a small sample before committing. Remember that ironing can dull colors slightly, so choose slightly brighter shades than you think you need. For more design inspiration, browse our coaster patterns and wall art ideas β€” many translate well to phone cases.

Step-by-Step: Ironing and Attaching Your Design

Once your design is laid out on the pegboard, cover it with ironing paper and iron on medium heat (about 300Β°F / 150Β°C) using circular motions. For phone cases, you want a fully fused, flat piece, so iron both sides. Start with 10-15 seconds on one side, let it cool, then flip and iron the other side. Check that all beads are melted together; if not, iron again briefly. Avoid over-ironing, which closes the bead holes and makes the piece look like plastic. After ironing, place the piece under a heavy book for 10 minutes to keep it flat. Once cooled, trim any uneven edges with small scissors or a file. Now you're ready to attach it to your phone case. If using double-sided tape, cut a piece slightly smaller than your design, stick it to the case, then press the bead piece on top. For glue, apply a thin, even layer to the back of the bead piece, press onto the case, and let it cure for 24 hours. Epoxy resin gives the most durable bond but requires careful mixing and a well-ventilated workspace. For a seamless look, consider embedding the design into a clear case. Simply place the bead piece on the inside of the case before snapping your phone in. This method is reversible and protects the beads from wear. If you're making keychains or charms to match, our keychain guide has you covered. And if you're crafting with kids, review our safety guide first.
Step-by-Step: Ironing and Attaching Your Design

More Tech Accessories to Fuse Bead

Phone cases are just the beginning. You can apply the same techniques to a wide range of tech accessories. Earbud cases, laptop lids, tablet stands, and even charging cables can be decorated with fuse beads. For earbud cases, use a smaller design and flexible glue so it can handle the curve. Laptop lids offer a large canvas β€” consider a full pixel art scene or a geometric pattern. Just be mindful of heat; don't place beads over vents. For cable organizers, fuse beads can be ironed into small clips or wraps that keep cords tidy. Our magnet set guide shows how to embed magnets into bead pieces, which is perfect for attaching a bead design to a metal phone grip or car mount. You can also create a bead-covered phone stand by gluing a fused piece to a plastic stand. If you enjoy making functional items, explore our photo frame tutorial and gift ideas for more inspiration. And don't forget storage β€” our storage guide helps you keep your supplies organized for your next project.

Frequently Asked Questions

Will fuse beads damage my phone case?

No, if you use removable adhesive like double-sided tape or place the design inside a clear case. Glue like E6000 is permanent and may leave residue if removed, but it won't damage the phone itself. Always avoid getting glue on your phone.

How do I make the beads stick without glue?

You can use double-sided tape or place the design inside a clear phone case. Another option is to iron the beads directly onto a heat-resistant case, but this is risky and can melt the case. Double-sided tape is the safest and most removable method.

Can I wash my fuse bead phone case?

If the beads are attached with waterproof glue or epoxy, you can gently wipe with a damp cloth. Avoid soaking or dishwashing, as this can loosen the adhesive. For tape-attached designs, remove the bead piece before cleaning the case.

What size fuse beads are best for phone cases?

Mid-size beads (5mm) are the most common and offer a good balance of detail and durability. Mini beads (2.6mm) allow for finer pixel art but are more fragile and time-consuming. For beginners, 5mm beads are recommended.

Ready to create your own patterns?

Open the Free Pattern Maker
Share: