Menu

FuseBeads Hub © 2026

Halloween Fuse Bead Patterns: Spooky Designs & Tips

Get inspired with Halloween fuse bead patterns! From pumpkins to witches, learn design tips, materials, and step-by-step guidance for spooky Perler bead crafts.

Beginner5 min read read

Why Halloween Fuse Bead Patterns Are a Crafty Hit

Halloween is the perfect excuse to break out your fuse beads and create a menagerie of spooky characters. Whether you're a seasoned Perler bead artist or just starting out, Halloween fuse bead patterns offer a fun, flexible way to decorate your home, make gifts, and get into the spirit of the season. The best part? You can adapt any pattern to your skill level—simple shapes for beginners, intricate scenes for advanced crafters. Fuse bead crafts are incredibly versatile for Halloween because the holiday embraces bold colors, quirky characters, and a touch of whimsy. From grinning jack-o'-lanterns to flying bats and bubbling cauldrons, the design possibilities are endless. Plus, these small plastic beads are affordable and widely available, making it easy to stock up on orange, black, purple, and green—the classic Halloween palette. If you're new to the hobby, our fuse beads for beginners guide will get you started with the basics. Beyond the fun factor, creating Halloween fuse bead patterns is a great way to engage kids in a screen-free activity. They can help sort beads, place them on pegboards, and watch the magic happen under the iron. Just be sure to follow safety guidelines, especially with younger children—our article on whether fuse beads are safe for kids covers everything you need to know. So grab your pegboards and let's conjure up some spooky designs!

Essential Materials and Tools for Spooky Perler Bead Projects

Before you dive into your Halloween fuse bead patterns, gather the right supplies. At a minimum, you'll need fuse beads in classic Halloween colors: orange, black, purple, green, white, and maybe a bit of yellow for glowing eyes. Midi beads (5mm) are the standard for most patterns, but you can also use mini beads for finer details. A square pegboard is your canvas, though specialty shapes like circles or hexagons can add variety. Don't forget ironing paper and an iron—our how to iron fuse beads guide walks you through the fusing process step by step. For more intricate designs, consider investing in a few helpful tools. Tweezers make placing tiny beads a breeze, especially when working on detailed faces or small accessories like witch hats. A bead organizer keeps your colors sorted and prevents frustrating mix-ups. If you're planning to make wearable items or decorations, you'll also want keychain rings, magnets, or ribbon. Our recommended fuse bead tools guide has a full list of must-haves and nice-to-haves. Storage is another consideration, especially if you're building a stash for multiple projects. Clear stackable containers or a bead storage box with compartments work well. For tips on keeping your beads organized and dust-free, check out our how to store fuse beads guide. With your materials ready, you can focus on the fun part—creating!
Essential Materials and Tools for Spooky Perler Bead Projects

Classic Halloween Characters: Pumpkins, Ghosts, and Bats

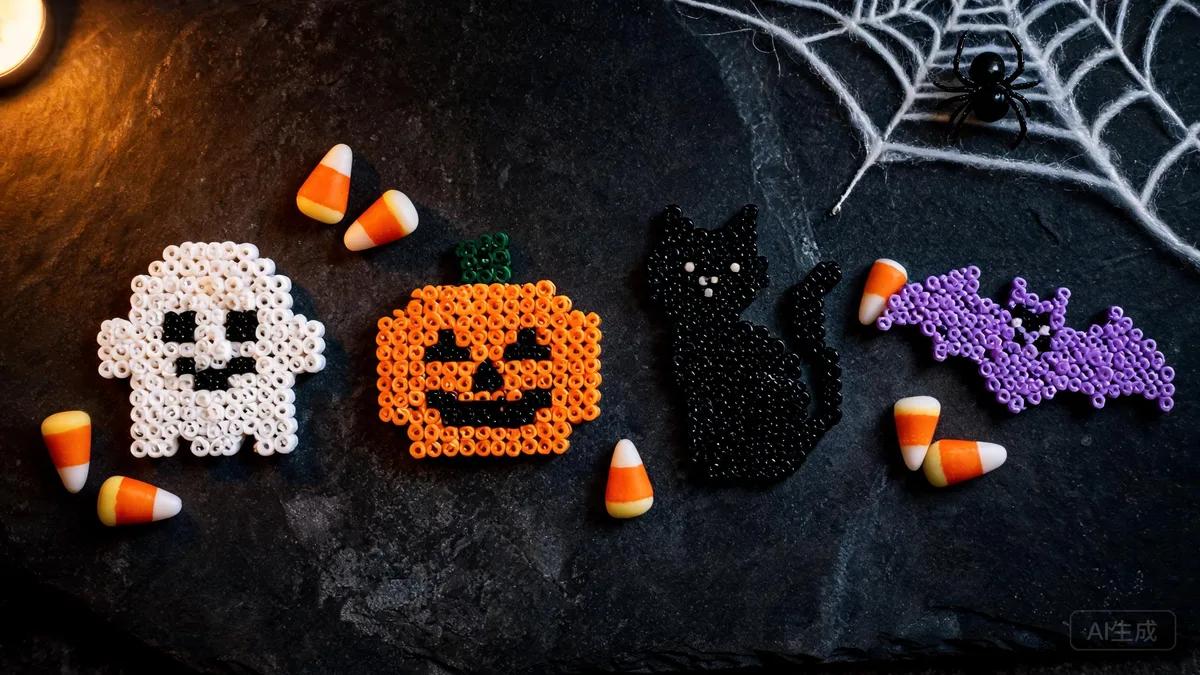
When it comes to Halloween fuse bead patterns, a few iconic characters reign supreme. The jack-o'-lantern is perhaps the most beloved. To create one, start with a round or slightly oval base in orange. Add a green stem at the top, then use black beads for the classic triangular eyes and jagged mouth. For a more menacing look, try angled eyebrows or a wider grin. You can also experiment with different pumpkin shapes—tall, squat, or even a stack of three. These make adorable coasters or ornaments for your Halloween party. Ghosts are another favorite because they're forgiving for beginners. A simple white blob with two black eyes and an open mouth is instantly recognizable. To add personality, give your ghost a cute bow, a trick-or-treat bag, or a surprised expression. You can also create a chain of ghosts holding hands—a fun project that works well as a wall art banner. For a glow-in-the-dark effect, use glow beads for the ghost's body; they charge under light and emit a soft green glow. Bats are a must for any spooky scene. Start with a black body and add pointed wings on either side. Small red or yellow beads for eyes add a sinister touch. You can hang finished bats from strings to create a mobile, or attach them to a wreath. For a more dynamic look, make bats in different sizes and arrange them in a flying formation. If you're feeling adventurous, combine pumpkins, ghosts, and bats into a single scene on a large pegboard—a haunted house silhouette with all three characters is a showstopper.

Witches, Cauldrons, and Other Bewitching Designs

No Halloween collection is complete without a witch or two. A classic witch pattern features a pointed black hat, a green face, and a flowing cape. Start with the hat—a triangle with a brim—then add the face below. Use purple or black for the dress and a broomstick in her hand. For a more detailed witch, add a bubbling cauldron at her feet. The cauldron itself is a fun pattern: a black pot with green or orange bubbles rising from it. You can even make the bubbles using glow beads for an eerie effect. If you want to expand beyond characters, consider other bewitching designs. A black cat with arched back and glowing eyes is a classic. A spider web made from white or silver beads can be draped across a pegboard and used as a decorative piece. A spooky tree with bare branches and a hanging bat is another striking option. These designs can be turned into magnets for your fridge or keychains for your backpack. For a truly unique project, try a 3D design like a standing witch or a haunted house. Our 3D fuse bead tutorial shows you how to create interlocking pieces that stand up on their own. Imagine a miniature witch's cottage with a removable roof—it's a challenging but rewarding build. And if you're looking for more inspiration, browse our cool ideas section for unexpected twists on Halloween themes.
Witches, Cauldrons, and Other Bewitching Designs

Design Tips and Techniques for Spooky Patterns

Creating your own Halloween fuse bead patterns is easier than you think. Start by sketching your design on graph paper—each square represents one bead. This helps you plan the layout and color placement before you commit to the pegboard. If you're not confident in your drawing skills, use a pattern generator to convert an image into a bead grid. Many crafters also find inspiration from pixel art or cross-stitch patterns, which translate perfectly to fuse beads. Color choice is crucial for a spooky effect. Stick to a limited palette of 3-4 colors per character to keep the design readable. Use high-contrast combinations like orange and black, purple and green, or white and black. For added depth, incorporate shading with two shades of the same color—e.g., dark orange for the pumpkin's ridges and light orange for the body. Our fuse bead color guide offers more advice on mixing and matching colors. When ironing, remember that over-ironing can flatten the beads and lose detail. Iron just until the beads fuse together, then let them cool under a heavy book to prevent warping. For a glossy finish, iron both sides; for a matte look, iron one side only. Finally, don't be afraid to experiment—Halloween is all about playful creativity. If a design doesn't work out, rearrange the beads and try again. The beauty of fuse beads is that they're forgiving and fun.

Displaying and Using Your Halloween Fuse Bead Creations

Once your spooky designs are fused and cooled, it's time to show them off. There are countless ways to display your Halloween fuse bead patterns. String them onto a garland or mobile to hang from the ceiling. Attach magnets to the back for fridge decorations. Glue a pin to the back to wear as a brooch or backpack accessory. For a festive table setting, use flat designs as coasters or place cards. You can also frame a collection of small patterns in a shadow box for a unique piece of wall art. If you're hosting a Halloween party, consider making fuse bead party favors. Keychains, bracelets, and bag tags are all easy to assemble and make great take-home gifts. Our Perler bead gift ideas guide has more inspiration for handmade presents. For a kid-friendly activity, set up a bead station where guests can create their own simple patterns—pumpkins and ghosts are perfect for beginners. Don't limit yourself to one season. Many Halloween designs can be adapted for other holidays or everyday use. A black cat can be a year-round decoration for cat lovers. A pumpkin can transition to Thanksgiving. And a ghost? Well, it's always in style. So get creative, and let your fuse bead spooky creations bring joy all year long.

Frequently Asked Questions

What colors of fuse beads do I need for Halloween patterns?

The essential Halloween palette includes orange, black, purple, green, and white. Yellow is useful for glowing eyes or candle flames, and red can add a sinister touch. You can also use glow-in-the-dark beads for an extra spooky effect. Start with a basic set of these colors and expand as needed.

Can I make Halloween fuse bead patterns with kids?

Absolutely! Fuse beads are a great craft for kids, but adult supervision is required during ironing. Choose simple patterns like pumpkins or ghosts for younger children, and let them place the beads. Always follow safety guidelines, and keep the iron out of reach. For more details, see our guide on fuse bead safety for kids.

How do I prevent my fuse bead designs from warping?

Warping happens when the beads cool unevenly. To prevent it, iron the design evenly on both sides (or one side for a matte finish), then immediately place a heavy book or flat object on top while it cools. This keeps the design flat. Also, avoid over-ironing, which can cause the beads to melt too much and lose their shape.

What can I make with Halloween fuse bead patterns?

The possibilities are endless! You can turn them into coasters, ornaments, wall art, magnets, keychains, pins, garlands, and more. They also make great party favors or gifts. For more ideas, check out our articles on things to make with Perler beads and Perler bead gift ideas.

Ready to create your own patterns?

Open the Free Pattern Maker
Share: