메뉴

FuseBeads Hub © 2026

Pokemon Fuse Bead Patterns: Catch Them All with Pixel Art

Learn to create Pokemon fuse bead patterns for Pikachu, Eevee, starters, and legendaries. Step-by-step guides, material lists, and pro tips for pixel-perfect results.

초급5 min read 분

Why Pokemon Fuse Beads Are a Crafter's Dream

Pokemon and fuse beads are a match made in pixel heaven. The original Game Boy sprites were literally pixel art, and fuse beads (also known as Perler, Hama, or Artkal beads) are the physical equivalent of those tiny squares. When you recreate a Pokemon with fuse beads, you're not just crafting—you're translating digital nostalgia into a tangible, colorful object. Whether you grew up playing Red and Blue or discovered the franchise through Pokemon GO, there's a special joy in seeing your favorite creature emerge bead by bead. The beauty of this craft is its accessibility. You don't need advanced drawing skills; you just need a pattern, a pegboard, and patience. The pixel grid of a fuse bead board naturally aligns with Pokemon sprites, making even complex legendaries approachable. Plus, the finished pieces are durable, lightweight, and perfect for keychains, magnets, coasters, or wall art. If you're new to the hobby, start with our fuse beads for beginners guide to master the basics before diving into Pokemon patterns. One of the best things about Pokemon fuse bead patterns is the sheer variety. With over 1,000 Pokemon species, you'll never run out of projects. You can start with iconic Gen 1 favorites like Pikachu and Charizard, then branch out to newer generations. The patterns are widely available online, or you can generate your own using pixel art tools. Many crafters even design custom patterns based on official sprite sheets, ensuring pixel-perfect accuracy.

Essential Materials and Tools for Pokemon Bead Art

Before you start your first Pokemon, gather the right supplies. You'll need midi or mini fuse beads in a rainbow of colors—at least the basics like black, white, red, yellow, blue, green, and brown. For Pikachu, yellow is your hero color; for Eevee, you'll need a range of browns and creams. A standard square pegboard (29x29 pegs) works for most small to medium Pokemon, while larger legendaries like Rayquaza may require multiple boards joined together. Tweezers are essential for placing beads precisely, especially in tight corners. And of course, you'll need ironing paper and an iron. Quality matters. Cheaper beads can vary in size, leading to uneven fusing. Brands like Perler, Hama, and Artkal are reliable, but each has slight differences in diameter and melting point. If you're mixing brands, test a small piece first. For a detailed comparison, check our Perler vs Hama vs Artkal guide. Also consider a bead organizer to keep colors sorted—nothing kills momentum like digging for a single black bead. For tools, a good pair of tweezers (curved tip is best) and a bead pen can speed up placement. Some crafters swear by a light pad underneath a clear pegboard to see the pattern more easily. If you plan to make many Pokemon, invest in a set of stackable pegboards and a storage system. Our fuse bead tools recommended article covers everything from irons to storage boxes. Finally, don't forget the pattern itself—print it out or display it on a tablet at a comfortable angle.
Essential Materials and Tools for Pokemon Bead Art

Step-by-Step: Crafting Pikachu, Eevee, and the Starters

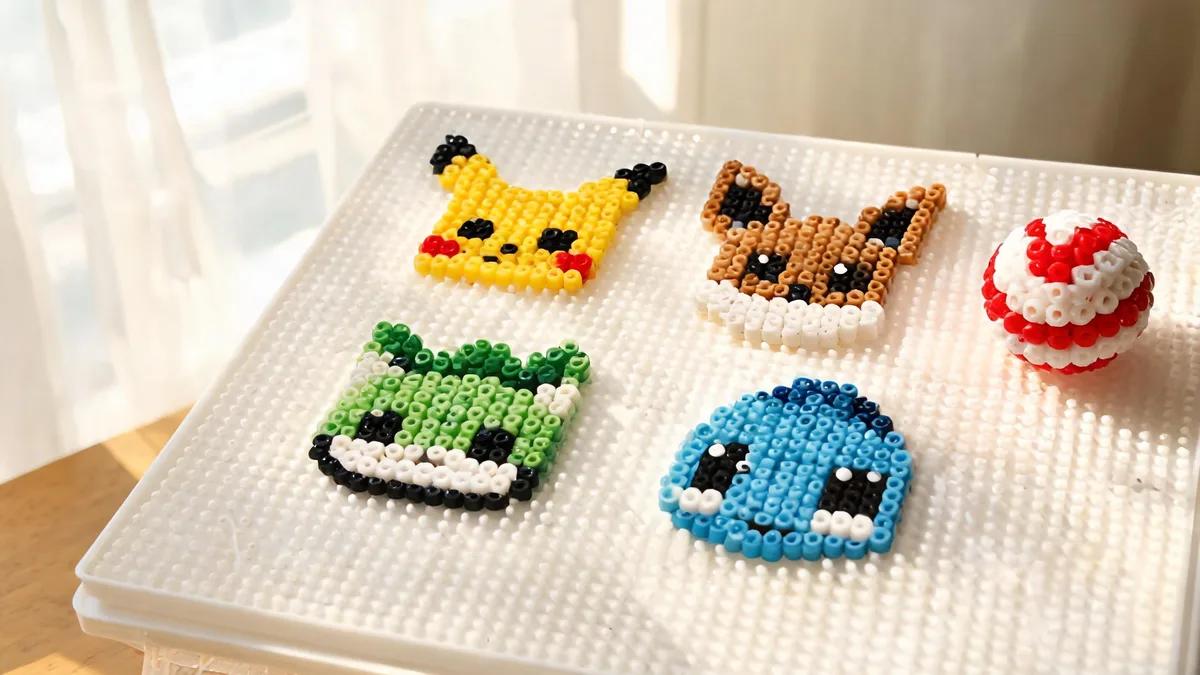
Let's start with Pikachu, the most iconic Pokemon. Begin with a clear pixel pattern—many free ones are available online. Place your pegboard on a flat, stable surface. Using tweezers, start with the outline: black for the ears and eyes, then fill in the yellow body. Work from one corner to another to avoid smudging. For the red cheeks, use a vibrant red bead. Once complete, cover with ironing paper and iron in circular motions for about 10-15 seconds, or until beads fuse. Flip and iron the other side for extra strength. Let it cool under a heavy book to prevent warping. For a full ironing tutorial, see our how to iron fuse beads guide. Eevee is slightly more complex due to its fluffy collar and multiple brown tones. Use a light tan for the body, dark brown for the ears and tail tip, and cream for the collar. Pay attention to the eyes—they're large and expressive, so use black and white beads to create highlights. The starters (Bulbasaur, Charmander, Squirtle) are excellent intermediate projects. Bulbasaur's bulb requires green and teal beads; Charmander's flame needs orange, yellow, and red; Squirtle's shell uses brown and cream. Each has a distinct silhouette, so accuracy in the outline is key. For legendaries like Mewtwo, Lugia, or Rayquaza, you'll need multiple pegboards and a lot of patience. These patterns often exceed 50x50 beads, so plan your color layout carefully. Use a fuse bead color guide to match shades accurately. Consider making smaller versions first to practice. Once you've mastered the basics, you can turn your creations into keychains, magnets, or even wall art.

Pro Tips for Pixel-Perfect Pokemon

Even with a great pattern, small mistakes can throw off your Pokemon. One common issue is uneven bead height—make sure all beads are pushed down fully onto the pegs. Another is color bleeding during ironing; use a lower heat setting and iron in small circles. If you're using a pattern from a screen, adjust brightness to avoid misreading similar shades. For dark colors like black and navy, place them last to avoid confusion. And always keep a spare bead of each color nearby for quick fixes. Another pro tip: work in sections. Instead of completing the entire Pokemon at once, break it into parts—head, body, limbs. This reduces eye strain and makes it easier to spot errors. If you're making multiple Pokemon, batch your ironing sessions to save time. Also, consider using a bead organizer with labeled compartments; it speeds up the process significantly. For storage tips, read our how to store fuse beads article. Finally, don't be afraid to modify patterns. Maybe you want a shiny version of Charizard—swap the orange for a darker red and the flame for blue. Or create a custom pose. The pixel art community is full of creative variations. If you're making gifts, our Perler bead gift ideas guide has inspiration for packaging and presentation. And if you want to display your collection, fuse bead coasters and ornaments are great functional projects.
Pro Tips for Pixel-Perfect Pokemon

Displaying and Using Your Pokemon Creations

Once your Pokemon are fused and cooled, the fun continues. Keychains are the most popular use—just attach a chain to a small hole or glue on a clasp. For a more permanent display, mount them on a canvas or shadow box. You can also turn them into magnets by gluing a magnetic strip to the back. Coasters are another great option; simply make a square or circular base and fuse your Pokemon on top. For a festive touch, consider making Christmas ornaments with a holiday-themed Pokemon like Delibird or Stantler. If you're feeling ambitious, try 3D Pokemon. Our 3D fuse bead tutorial shows how to create standing figures by slotting flat pieces together. This works well for blocky Pokemon like Pikachu or Bulbasaur. For jewelry, small patterns can become earrings or pendants. And for kids, fidget toys made from fuse beads are a hit. Just ensure safety—small beads are a choking hazard for young children, so supervise. Our fuse beads safe for kids guide covers age recommendations. Finally, don't forget to share your work! The crafting community loves seeing Pokemon creations. Post on social media with hashtags like #PokemonPerler or #FuseBeadArt. You might even inspire someone else to start. And if you're looking for more ideas, browse our things to make with Perler beads and cool ideas pages. Happy crafting—and remember, you gotta catch 'em all!

자주 묻는 질문

What size fuse beads are best for Pokemon patterns?

Midi beads (5mm) are the most popular for Pokemon because they're easy to handle and widely available. Mini beads (2.6mm) allow for finer detail but are harder to place and require more patience. For beginners, start with midi. For large legendaries, midi is also more practical as mini would require an enormous number of beads.

Can I use any brand of fuse beads for Pokemon?

You can, but it's best to stick to one brand per project. Different brands have slightly different diameters and melting points, which can cause uneven fusing. Perler, Hama, and Artkal are all reliable. If you must mix, test a small sample first to ensure compatibility.

How do I prevent my Pokemon fuse bead art from warping?

Warping usually happens from uneven cooling or too much heat. After ironing, immediately place a heavy flat object (like a book) on top while it cools. Iron both sides evenly and avoid overheating. If it still warps, you can re-iron gently and cool under weight again.

Where can I find free Pokemon fuse bead patterns?

Many websites offer free patterns, including Pinterest, DeviantArt, and dedicated fuse bead forums. You can also use pixel art tools to convert official sprite sheets into bead patterns. For best results, search for 'Pokemon perler bead pattern' followed by the Pokemon's name. Always respect copyright if selling finished items.

나만의 패턴을 만들 준비가 되셨나요?

무료 패턴 메이커 열기
공유: