메뉴

FuseBeads Hub © 2026

Fuse Bead Seasonal Calendar: Year-Round Perpetual Craft Guide

Create a perpetual fuse bead calendar with monthly themed patterns and display ideas. Step-by-step guide, material lists, and tips for year-round crafting.

초급5 min read 분

Why Make a Perpetual Fuse Bead Calendar?

A perpetual fuse bead calendar is more than a craft project—it's a year-round decoration that evolves with the seasons. Unlike paper calendars that get tossed after December, this reusable masterpiece lets you swap out monthly themed tiles, celebrating everything from spring blossoms to winter snowflakes. It's a wonderful way to showcase your pixel art skills while creating a functional piece of home decor. The concept is simple: build a sturdy base (often a wooden frame or a large pegboard grid) and create twelve interchangeable monthly panels. Each panel features a seasonal motif—think hearts for February, pumpkins for October, or beach scenes for July. Because the panels are removable, you can store them safely and rotate them month by month. This makes it an excellent gift for crafty friends or a family project that kids can help with. For beginners, start with our fuse beads for beginners guide to master the basics before tackling a full calendar. Beyond decoration, a perpetual calendar teaches planning and patience. You'll learn to map out a color palette, estimate bead quantities, and iron each panel evenly. The result is a durable, glossy piece that can last for years. Plus, it's a conversation starter—guests love seeing the new monthly design and often ask how it's made.

Materials and Tools for Your Calendar Base
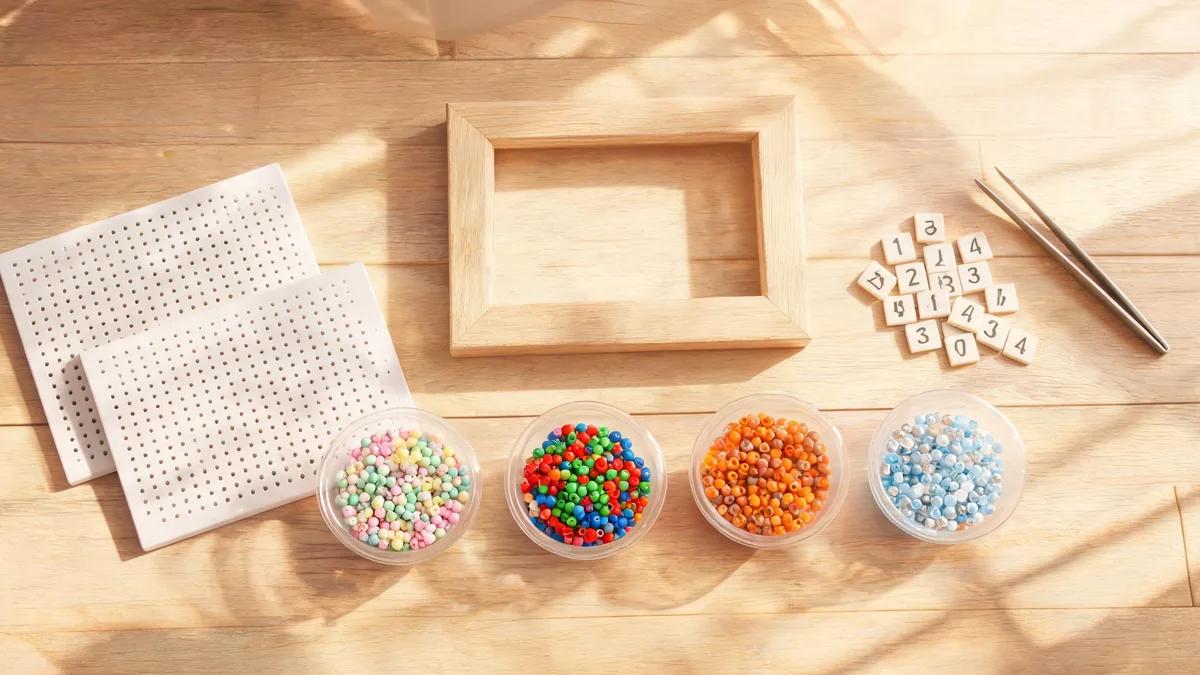
Before you dive into monthly patterns, you'll need a solid foundation. The base should be rigid enough to hold the weight of multiple bead panels. A wooden picture frame (8x10 or 11x14 inches) works beautifully—just remove the glass and backing, then attach a large square pegboard to the frame using hot glue or small screws. Alternatively, you can use a thick foam board covered with felt, but wood offers better durability. For the panels themselves, you'll need standard fuse beads (midi size 5mm is ideal for detail), pegboards in various shapes (square, circle, heart), and ironing paper. A good fuse bead tools recommended list includes tweezers for placing beads, a bead organizer, and a reliable iron with adjustable temperature. Don't forget a fuse bead color guide to plan your seasonal palettes—having a printed chart helps you choose harmonious colors. To attach panels to the base, use adhesive-backed hook-and-loop tape (Velcro) or small rare-earth magnets. Magnets allow for easy swapping and a clean look, but Velcro is more forgiving if your panels aren't perfectly flat. For a polished finish, consider framing each panel with a thin border of beads in a neutral color like black or white. This creates a cohesive look across all twelve months. If you're new to ironing, review our how to iron fuse beads tutorial to avoid common mistakes like over-melting or warping.
Materials and Tools for Your Calendar Base

Monthly Themed Patterns: A Seasonal Inspiration Guide

Now for the fun part—designing twelve unique panels. Start with January: a snowflake or a cozy mug of hot cocoa sets a wintery tone. February calls for hearts, roses, or a cute cupid. March brings spring with a shamrock or a blooming daffodil. April showers can be represented by an umbrella or raindrops, while May features flowers and butterflies. June is perfect for a sun, beach ball, or ice cream cone. July screams summer—think fireworks, a watermelon slice, or a sandcastle. August can continue the beach theme with a seashell or a sunhat. September signals back-to-school with an apple, pencil, or autumn leaf. October is all about Halloween: pumpkins, ghosts, or black cats. November brings gratitude with a turkey, cornucopia, or fall leaves. Finally, December sparkles with a Christmas tree, snowman, or gift box. For more ideas, browse our things to make with perler beads collection. Each panel should be roughly the same size to fit your base—aim for 4x4 or 5x5 inches. Use a consistent border color to unify the set. If you're short on time, you can simplify patterns to 3-4 colors. Remember, the goal is charm, not photorealism. Kids can help by sorting beads or placing them on the pegboard, making this a wonderful family activity. For animal-themed months, check our animals ideas for cute critters like bunnies (April) or owls (October).

Display Ideas and Creative Variations

How you display your calendar is just as important as the panels themselves. The classic approach is a wall-mounted frame, but you can also create a standing easel calendar for a desk or mantel. For a more interactive version, attach the panels to a large magnetic board and use a separate bead-made marker to indicate the day. If you enjoy making wall art, you can integrate the calendar into a larger seasonal gallery wall that changes quarterly. Another variation is a "countdown" calendar where each panel has a small pocket or hook for a daily bead token. For example, in December, you could add a tiny bead ornament each day until Christmas. This combines the perpetual calendar with an advent-style activity. You can also create a "birthday" panel for each family member, swapping it in during their birth month. The possibilities are endless. To keep your calendar looking fresh, store unused panels in a cool, dry place away from direct sunlight. Use a how to store fuse beads system with labeled zip bags or a binder with plastic sleeves. This prevents dust and color fading. If a panel gets damaged, you can easily re-iron it or create a replacement. For gift-giving, consider making a mini calendar with just four seasonal panels—a perfect perler bead gift idea for housewarmings or holidays.
Display Ideas and Creative Variations

Step-by-Step: Assembling Your Perpetual Calendar

Ready to build? Follow these steps for a smooth assembly. First, gather all materials: wooden frame, large square pegboard, fuse beads, iron, ironing paper, tweezers, Velcro or magnets, and a ruler. Second, prepare the base by attaching the pegboard to the frame. If using Velcro, cut strips and adhere them to the frame and the back of each panel. For magnets, glue small magnets to the frame and matching ones to the panels. Third, create your first panel. Choose a design, place beads on the pegboard, and iron according to the instructions. Let it cool completely before removing. Repeat for all twelve months. Fourth, test the fit—each panel should sit flush against the base without overlapping. Adjust as needed. Fifth, add a decorative header to the frame, such as a bead banner spelling "Calendar" or a row of seasonal icons. Finally, hang or place your calendar in a prominent spot. Rotate the panels at the start of each month. To keep track of which panel is next, store them in order. If you want to add a personal touch, create a small bead pointer shaped like an arrow to mark the current day. For more advanced techniques, like 3D elements, see our 3D fuse bead tutorial. With a little patience, you'll have a stunning, functional piece that celebrates the whole year.

자주 묻는 질문

How many fuse beads do I need for a perpetual calendar?

The exact number depends on the size and complexity of your panels. On average, a 4x4-inch panel uses about 400-600 beads. For twelve panels, plan for 5,000-7,000 beads total. It's wise to buy extra of your base colors (like black or white for borders) and seasonal colors. A standard 1,000-bead bag covers roughly two panels, so start with a multi-color set and replenish as needed.

Can I use mini fuse beads instead of midi for a calendar?

Yes, you can use mini beads (2.6mm), but they require more time and precision. Mini beads allow for finer details, which is great for intricate designs like snowflakes or floral patterns. However, they are harder for children to handle and may need a magnifying glass. If you choose mini, use a smaller pegboard and adjust your panel size accordingly. Just note that mini panels will be more fragile, so handle with care.

How do I prevent the panels from warping or curling?

Warping usually happens from uneven ironing or overheating. To prevent it, iron on a flat, heat-resistant surface and use consistent, circular motions. Don't over-iron—just enough for the beads to fuse. After ironing, place a heavy book on the panel while it cools to keep it flat. If a panel does warp, you can re-iron it gently and press it flat again. Using a thicker pegboard and quality beads also helps maintain shape.

Is this project suitable for kids?

Absolutely, with adult supervision. Children can help sort beads, place them on the pegboard, and choose designs. However, ironing should be done by an adult. For younger kids, simplify patterns to 2-3 colors and use larger midi beads. This project teaches patience, color recognition, and fine motor skills. It's a wonderful family bonding activity. Just ensure beads are kept away from toddlers who might swallow them.

나만의 패턴을 만들 준비가 되셨나요?

무료 패턴 메이커 열기
공유: