메뉴

FuseBeads Hub © 2026

Fuse Bead Jewelry: DIY Earrings, Brooches & Pendants Guide

Learn to make stunning fuse bead jewelry: earrings, brooches, and pendants. Step-by-step tutorial with materials, design tips, and FAQs for crafters.

초급5 min read 분

Why Fuse Bead Jewelry?

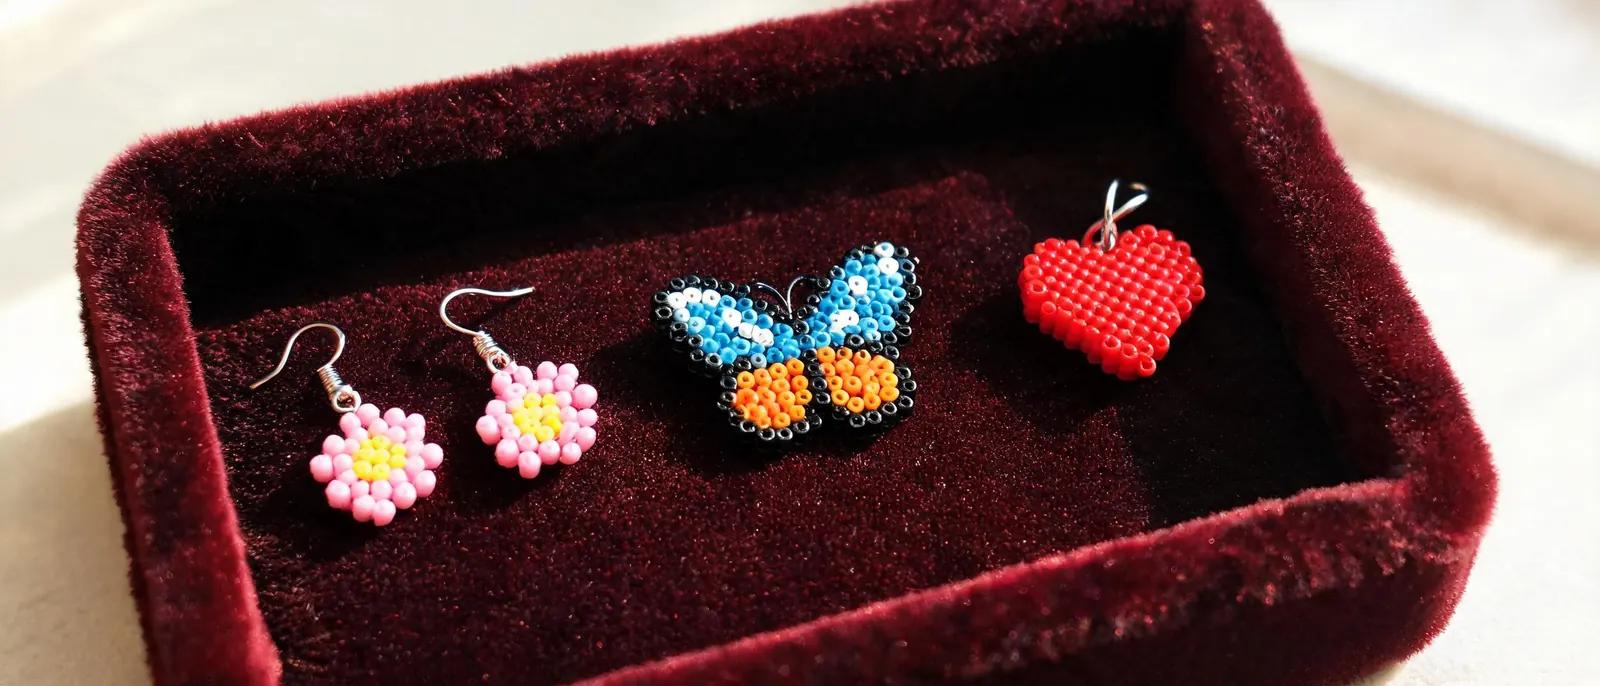
Fuse bead jewelry is one of the most rewarding and accessible crafts you can try. With just a few basic supplies—beads, a pegboard, an iron, and jewelry findings—you can create custom earrings, brooches, and pendants that look professionally made. Unlike traditional beadwork, fuse beads (also known as Perler, Hama, or Artkal beads) are melted together, giving you a sturdy, lightweight piece that holds its shape beautifully. Whether you're a beginner looking for a fun afternoon project or an experienced crafter seeking a new medium, fuse bead jewelry offers endless creative possibilities. The appeal goes beyond simplicity. Fuse beads come in hundreds of colors, including glitter, glow-in-the-dark, and metallic finishes, so you can match any outfit or occasion. You can design pixel art hearts, flowers, geometric shapes, or even tiny portraits. Because the pieces are lightweight, they're comfortable to wear all day. Plus, making your own jewelry is budget-friendly—a single batch of beads can yield dozens of gifts. If you're new to the craft, start with our beginner's guide to learn the basics before diving into jewelry-making. Another advantage is the sheer variety of jewelry you can make. Earrings are quick and satisfying, often taking just 15–20 minutes per pair. Brooches let you experiment with larger, more detailed designs that can be worn on jackets, hats, or bags. Pendants can be as simple or as intricate as you like, from minimalist shapes to elaborate mandalas. No matter your style, there's a fuse bead jewelry project waiting for you.

Essential Tools and Materials for Fuse Bead Jewelry

Before you start, gather the right supplies. For the beads themselves, standard midi beads (5mm) work best for earrings and small pendants, while mini beads (2.6mm) allow for finer detail in delicate designs. For brooches, you can use either size, though midi beads create a bolder look. You'll also need a pegboard—small square or hexagon boards are ideal for jewelry. A reliable iron with adjustable temperature is crucial; too much heat will flatten your design, while too little won't fuse the beads properly. Check our recommended tools guide for specific product suggestions. For the jewelry hardware, you'll need earring hooks (fishhook or stud style), jump rings, pendant bails, brooch pins, and strong jewelry glue (E6000 or similar). A pair of flat-nose pliers and round-nose pliers will help you open and close jump rings cleanly. If you plan to make many pieces, consider a small hand drill or a bead reamer to enlarge holes if needed. Tweezers are also handy for placing tiny beads precisely. Don't forget the finishing touches. Ironing paper (or parchment paper) protects your iron and the beads. A heat-resistant surface, like a wooden cutting board, keeps your workspace safe. For a polished look, you can apply a coat of clear acrylic sealant or Mod Podge to your finished pieces—this adds durability and a slight sheen. Finally, a storage container with compartments keeps your beads organized by color. Our storage guide has great tips for keeping your collection tidy.
Essential Tools and Materials for Fuse Bead Jewelry

Step-by-Step: Making Fuse Bead Earrings

Earrings are the perfect entry point into fuse bead jewelry. Start by choosing a small design—a heart, star, flower, or geometric shape—that fits within a 3x3 or 5x5 peg area. If you need inspiration, browse our cool ideas or animal designs. Place your beads on the pegboard following your pattern. Remember that the finished piece will be a mirror image, so if you're making letters or asymmetrical shapes, plan accordingly. For a pair, make two identical designs side by side. Once your design is complete, cover it with ironing paper and iron on medium heat (about 300°F / 150°C) using circular motions for 10–20 seconds. Check if the beads are fused; if not, iron a bit longer. Don't over-iron—you want the holes to remain slightly visible for a classic look. Let the piece cool completely, then peel it off the pegboard. If you want a more durable finish, flip the piece over, cover with paper, and iron the back side as well. This makes the earrings sturdier. Now attach the hardware. For fishhook earrings, use a jump ring: open the ring with pliers, thread it through the top hole of your bead design (or through a small hole you've made with a drill), then add the earring hook and close the ring securely. For stud earrings, glue a flat pad earring post to the back using strong jewelry glue and let it cure for 24 hours. If your design doesn't have a natural hole, you can glue a bail or a small loop to the top. Our dedicated earring tutorial goes into even more detail with advanced techniques.

Designing Brooches and Pendants

Brooches and pendants allow for larger, more expressive designs. For brooches, think about shapes that work well on a lapel or bag: abstract geometric patterns, flowers, birds, or even miniature landscapes. Because brooches are worn on fabric, they can be slightly heavier, so you can use midi beads and a larger pegboard. Create your design, fuse it as usual, and then attach a brooch pin to the back with strong glue. For extra security, you can also sew the pin through a small hole in the beadwork. If you want a 3D effect, consider layering two fused pieces—our 3D tutorial shows you how. Pendants are versatile and can be worn on necklaces, bracelets, or even as zipper pulls. The key is to incorporate a hanging loop. You can either leave a hole in your design (by omitting a bead at the top) or glue a pendant bail to the back. Bails come in many styles—glue-on, pinch, or screw-in—so choose one that matches your design's weight. For a clean look, use a bail that complements the bead colors. If you're making a pendant for a gift, consider a meaningful symbol like a heart, initial, or birth flower. Our gift ideas guide has more inspiration. When designing, pay attention to color contrast and negative space. A pendant with a simple outline often looks more elegant than a busy, filled-in design. Use our color guide to pick harmonious palettes. Also, think about the final size: a pendant should be between 1 and 2 inches (2.5–5 cm) for comfortable wear. For brooches, 2–3 inches (5–7.5 cm) is a good range. Always test the weight and balance before attaching the hardware.
Designing Brooches and Pendants

Tips for Professional-Looking Results

To make your fuse bead jewelry look truly polished, pay attention to the details. First, iron evenly. Uneven fusing creates weak spots and an inconsistent texture. Use a gentle, circular motion and check frequently. If you're making a pair of earrings, iron both pieces for the same amount of time so they match. Second, trim any excess plastic or rough edges with small scissors after fusing. This is especially important for pieces with fine details. Third, choose quality hardware. Cheap earring hooks can tarnish or irritate sensitive skin. Look for hypoallergenic options like stainless steel or sterling silver. For brooches, a locking pin back prevents accidental opening. For pendants, a sturdy bail ensures your piece stays secure. Fourth, consider adding a protective finish. A thin layer of clear sealant not only protects the beads from wear but also gives a subtle shine. However, avoid heavy coatings that might obscure the bead texture. Finally, experiment with mixed media. You can combine fuse beads with resin, wire wrapping, or even fabric to create unique jewelry. For example, glue a small fuse bead flower onto a fabric-covered button for a brooch. Or string multiple small pendants onto a chain for a layered necklace. The possibilities are endless. If you're making jewelry with kids, be sure to follow safety guidelines—our safety guide covers ironing precautions and age recommendations.

자주 묻는 질문

What size fuse beads are best for jewelry?

For most jewelry, midi beads (5mm) are the standard choice because they are easy to handle and readily available. They work well for earrings, brooches, and medium pendants. Mini beads (2.6mm) are ideal for intricate, delicate designs like tiny flowers or detailed pendants, but they require more patience and a steady hand. If you're a beginner, start with midi beads. For a comprehensive comparison, see our guide to choosing beads.

How do I attach earring hooks to fuse bead designs?

There are two main methods. First, if your design has a hole at the top (either naturally from the bead pattern or drilled), use a jump ring to connect the earring hook. Open the jump ring with pliers, thread it through the hole and the hook, then close it securely. Second, for designs without a hole, glue a flat pad earring post or a small bail to the back using strong jewelry glue like E6000. Allow 24 hours to cure. Always test the bond before wearing.

Can fuse bead jewelry get wet?

Fuse bead jewelry is water-resistant but not waterproof. Light moisture, like hand washing, is generally fine, but prolonged exposure to water can weaken the glue used for hardware and cause the beads to separate over time. To extend the life of your jewelry, remove it before swimming, showering, or doing dishes. If you want extra protection, apply a clear acrylic sealant to the beads, which adds a water-resistant layer. Avoid soaking the metal findings, as they may tarnish.

How do I prevent my fuse bead jewelry from breaking?

Durability depends on proper fusing and quality hardware. Iron both sides of the design for a stronger bond, and don't over-iron, which can make the plastic brittle. Use strong glue (E6000) for attaching hardware, and consider reinforcing with a jump ring through a drilled hole. For brooches, choose a locking pin back. Also, store your jewelry flat in a box to avoid bending or scratching. If a piece does break, you can often repair it by re-ironing the broken area or using a small amount of glue.

나만의 패턴을 만들 준비가 되셨나요?

무료 패턴 메이커 열기
공유: