メニュー

FuseBeads Hub © 2026

Fuse Bead Weapons: Craft Epic Swords, Shields & Cosplay Props

Learn to craft fuse bead weapons like swords, shields, and fantasy props for cosplay. Step-by-step guide, material list, and pro tips for pixel art replicas.

初心者5 min read で読了

Why Fuse Bead Weapons Are Taking Over Cosplay

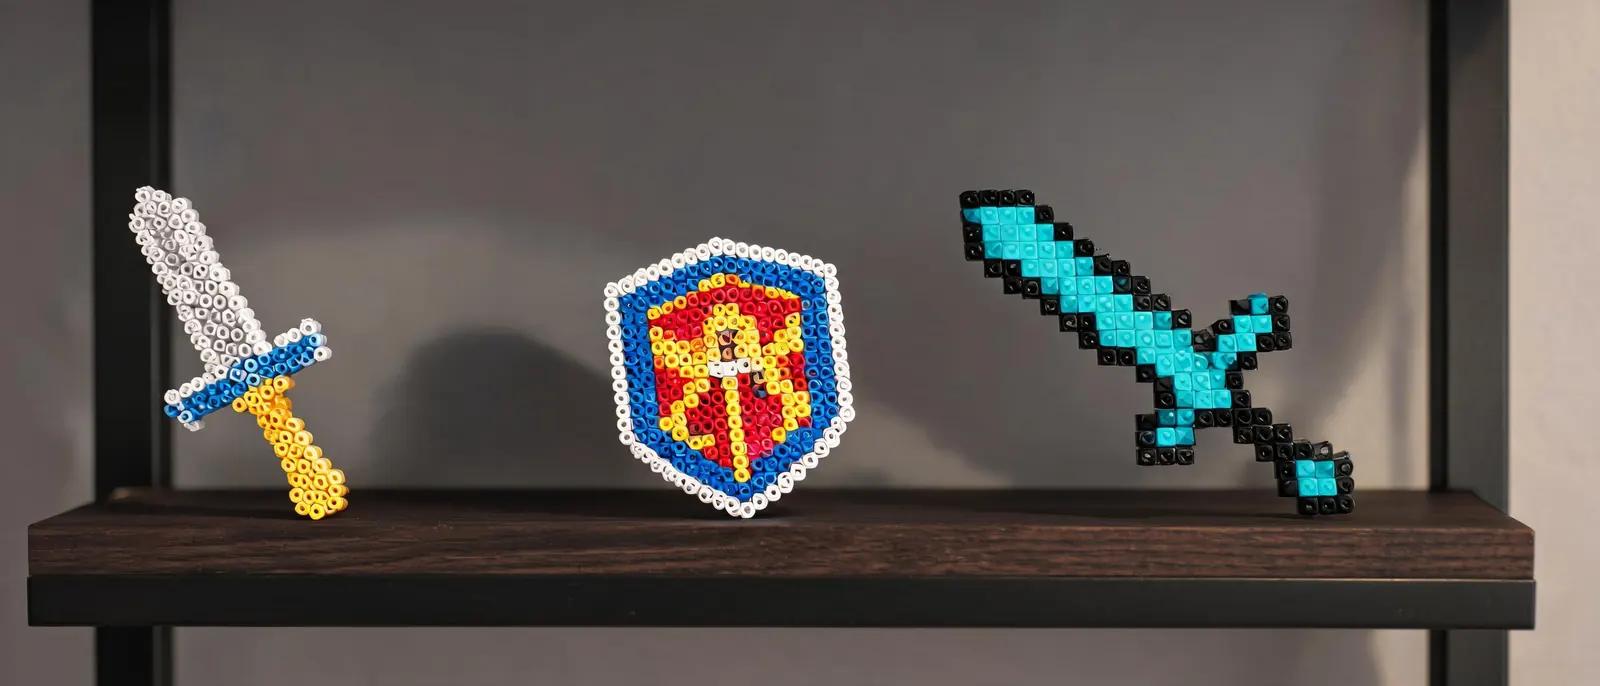
Fuse bead weapons have exploded in popularity among cosplayers and crafters who want lightweight, customizable, and eye-catching props without the cost or weight of foam or 3D-printed alternatives. Whether you're building a pixel-perfect Master Sword from The Legend of Zelda or a stylized fantasy dagger for a convention, fuse beads (also known as Perler, Hama, or Artkal beads) offer a unique 8-bit aesthetic that stands out on any convention floor. The best part? You can create these replicas at home with tools you probably already own. Unlike traditional prop-making, fuse bead weapons are built from the ground up using a grid system, making them surprisingly beginner-friendly. The pixelated look isn't a limitation—it's the entire charm. A sword made from fuse beads reads as both retro and modern, appealing to gamers, anime fans, and fantasy enthusiasts alike. If you're new to the hobby, start with our beginners guide to get comfortable with the basics before tackling larger builds. In this article, we'll walk you through everything you need to know: materials, design principles, step-by-step construction, and finishing techniques that make your weapon props durable enough for a full convention weekend. We'll also cover how to scale patterns, reinforce large pieces, and attach handles or straps so your creations are not just display pieces but functional costume accessories.

Essential Materials and Tools for Weapon-Grade Builds

Before you start swinging a bead sword around, you need the right supplies. The foundation is, of course, fuse beads. For weapons, midi beads (5mm) are the standard because they offer a good balance of detail and structural integrity. If you want finer details—like a jeweled hilt or intricate runes—consider mini beads (2.6mm), though they require more patience and a steadier hand. Color selection matters more than you might think; a fuse bead color guide can help you choose metallic-look beads, gradients for blade shading, and contrasting tones for handles. You'll also need pegboards. Large square boards are ideal for swords, but interlocking boards let you create longer blades. Our guide to the best fuse bead pegboards covers which boards work best for oversized projects. For ironing, use parchment paper and an iron with adjustable temperature—our how to iron fuse beads tutorial explains the flat-iron vs. textured finish debate, which is crucial for weapons that need to look sleek or battle-worn. Beyond the basics, consider these structural add-ons: a hot glue gun for attaching handles, wooden dowels or thick craft sticks for internal support, and clear acrylic spray to seal and protect your finished piece. For a truly professional look, EVA foam or felt can back your bead work, adding thickness and a comfortable grip. If you plan to make multiple weapons, a recommended tools list will save you time and frustration. Finally, keep your beads organized—a storage guide prevents the chaos of mixed colors mid-project.
Essential Materials and Tools for Weapon-Grade Builds

Designing Your Weapon: From Pixel Art to Pattern

Every great fuse bead weapon starts with a solid pattern. You have two main options: find an existing pixel art design or create your own. For iconic weapons like Minecraft's diamond sword or Link's Master Sword, you can often find free patterns online or use a pattern generator to convert an image into a bead grid. When designing your own, think in terms of silhouette first—a sword's blade, crossguard, and pommel should be immediately recognizable even in low resolution. Use graph paper or digital tools to map out your design bead by bead. Scale is critical. A convention-ready sword should be at least 20–30 beads long for the blade alone, while a dagger might be 10–15 beads. Shields can be built as flat panels or given a slight curve using multiple joined sections. For a 3D effect, consider building the weapon in layers: a flat main body, then raised details for the hilt or blade edge. Our 3D fuse bead tutorial walks you through the techniques for adding depth, which is especially useful for fantasy weapons with ornate hilts. Don't forget about color theory. Metallic beads (silver, gold, bronze) work wonders for blades, while dark greys and blacks give a forged, battle-worn look. For fantasy weapons, incorporate bright accent colors like ruby red or sapphire blue for gems. If you're making a set—say, a sword and shield combo—keep a consistent palette. Sketching your design in color first saves hours of rework later. And if you're feeling stuck, browse our cool ideas section for inspiration from other crafters.

Step-by-Step: Building a Fuse Bead Sword

Ready to build? Let's walk through a classic sword. First, assemble your pegboard and lay out your beads following your pattern. Start with the blade, working from the tip down to the base. For a straight sword, use a large square board; for a longer blade, connect two boards with interlocking tabs. As you place beads, double-check symmetry—a wonky blade is hard to fix after ironing. Once the blade is complete, build the crossguard and handle on separate boards or extend the same board if space allows. Ironing is the make-or-break step. Place parchment paper over your design and iron in circular motions with medium heat. For weapons, aim for a fully fused, flat finish on both sides to maximize strength. Flip the piece carefully (use a second sheet of parchment) and iron the back. Avoid over-ironing, which closes the holes and makes the piece look melted. If you want a textured look, iron lightly on one side only. For large pieces, iron in sections to avoid warping. After ironing, let the piece cool completely under a heavy book to prevent curling. Now it's time to assemble. If your sword has multiple parts, use hot glue or strong craft glue to join them. For extra rigidity, glue a wooden dowel or thick craft stick along the back of the blade and handle. Wrap the handle with ribbon, leather cord, or EVA foam for a comfortable grip. Finally, spray with clear acrylic sealer to protect against moisture and wear. Your sword is now ready for cosplay! For more project ideas, check out things to make with Perler beads.
Step-by-Step: Building a Fuse Bead Sword

Shields, Fantasy Items, and Advanced Techniques

Once you've mastered the sword, expand your arsenal with shields and fantasy items. Shields are essentially large flat panels, but you can add a 3D boss (the center bump) by layering smaller fused circles. For a round shield, use a circular pegboard or arrange beads in a radial pattern. Attach straps on the back using ribbon and hot glue so you can actually wear it. Fantasy items like magic staffs, axes, and bows follow similar principles: build the main shape, reinforce with dowels, and add decorative elements like beads that glow in the dark or metallic accents. For truly show-stopping pieces, experiment with mixed media. Combine fuse beads with LED lights (battery-operated fairy lights) to make a glowing magic sword. Use resin or clear nail polish to create gem-like effects on hilt jewels. You can even embed small magnets to attach your weapon to a costume or display stand—our fuse bead magnets set guide covers the basics of magnet integration. If you're making a wall-mounted display, consider framing your weapon as wall art. Durability is always a concern for cosplay props. To make your weapon convention-proof, reinforce all joints with hot glue and consider coating the entire piece in a thin layer of epoxy resin (in a well-ventilated area). Avoid leaving fuse bead props in hot cars, as they can soften. With proper care, a well-made fuse bead weapon can last for years and become a signature piece of your cosplay repertoire.

Finishing Touches and Display Ideas

The difference between a good fuse bead weapon and a great one is in the finishing. After assembly, inspect your piece for any loose beads or uneven edges. Use a sharp craft knife to trim excess glue or stray bead nubs. For a polished look, apply a thin coat of matte or glossy mod podge—glossy for magical weapons, matte for realistic ones. If your weapon has a handle, wrap it with faux leather or athletic tape for a comfortable, realistic grip. Add a pommel gem or tassel for extra flair. Displaying your creations is half the fun. For a collection, mount your weapons on a wall using command hooks or a custom rack. If you want to show off smaller items like daggers or wands, consider making a photo frame shadow box. For convention display, a simple stand made from foam board and covered in fabric works wonders. And if you're gifting a weapon to a fellow cosplayer, present it in a handmade box or bag—our gift ideas guide has plenty of inspiration. Remember, fuse bead weapons are a conversation starter. They show off your creativity, your fandom, and your craftsmanship all at once. Whether you're a seasoned cosplayer or a parent crafting with kids, the process is rewarding and the results are impressive. So grab your beads, fire up your iron, and start building your arsenal—your next cosplay masterpiece is just a few hundred beads away.

よくある質問

How durable are fuse bead weapons for cosplay?

With proper reinforcement—such as internal dowels, full fusion on both sides, and a clear acrylic sealant—fuse bead weapons can be surprisingly durable. They can withstand a full convention day if handled carefully. However, they are not indestructible; avoid dropping them on hard surfaces or exposing them to extreme heat. For best results, reinforce all joints with hot glue and consider a resin coating for high-stress areas.

Can I make a fuse bead sword that actually looks like a real weapon?

Absolutely! The pixelated aesthetic is part of the charm, but you can achieve a surprisingly realistic look by using metallic beads, shading gradients, and 3D layering. Adding a wooden dowel core and wrapping the handle with leather or foam enhances realism. Many cosplayers use fuse bead weapons for their unique retro-futuristic or video game-inspired looks, which can be more striking than traditional props.

What size beads are best for weapons?

Midi beads (5mm) are the most popular choice for weapons because they offer a good balance of detail, strength, and availability. Mini beads (2.6mm) allow for finer details but are more time-consuming and fragile. For very large weapons like greatswords or shields, midi beads are generally recommended to keep the project manageable and sturdy.

How do I attach a handle to my fuse bead weapon?

The best method is to create the handle as a separate fused piece and attach it to the blade using hot glue or strong epoxy. For added stability, insert a wooden dowel or thick craft stick through the center of the handle and into the blade, gluing it in place. Then wrap the handle with ribbon, leather cord, or EVA foam for a comfortable grip. This creates a secure, realistic-looking handle that can withstand handling.

オリジナルパターンを作成する準備はできましたか?

無料の図案メーカーを開く
シェア: