Menu

FuseBeads Hub © 2026

Fuse Bead Punch Needle Art: Mixed Media Wall Art Tutorial

Learn to combine fuse beads with punch needle embroidery for stunning textured wall art. Step-by-step guide, material list, and pro tips for this mixed media craft.

Débutant5 min read de lecture

Why Combine Fuse Beads with Punch Needle?

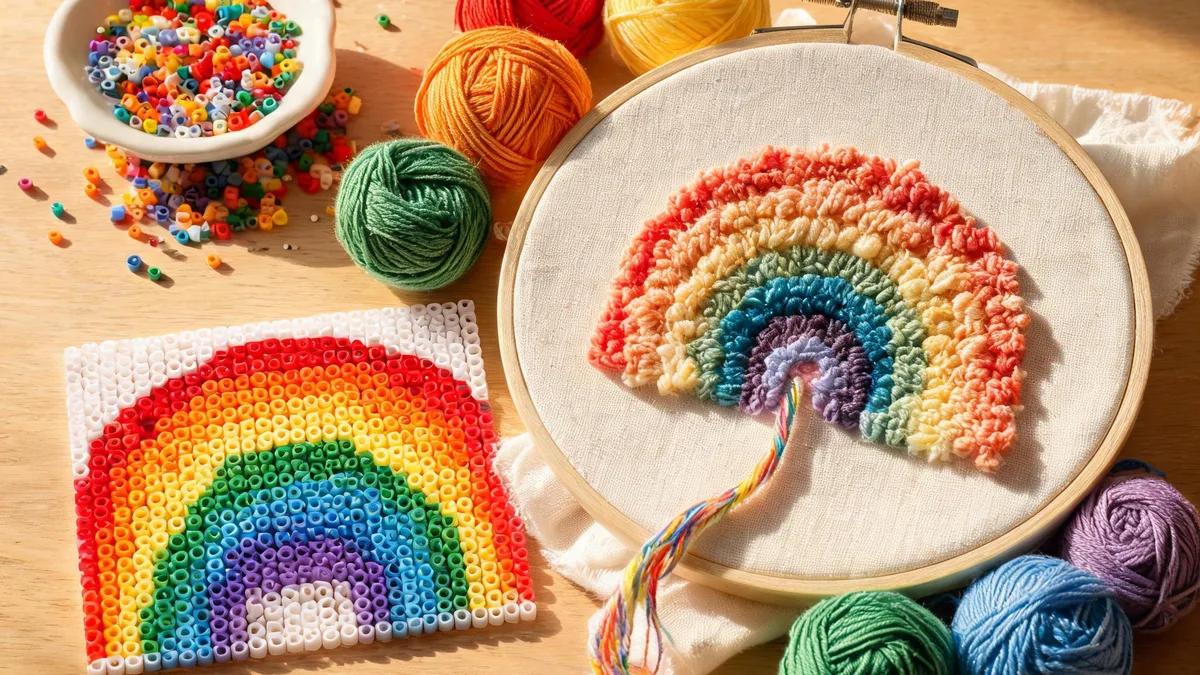
Fuse beads and punch needle embroidery might seem like an unlikely pair, but together they create a captivating contrast of textures that neither craft can achieve alone. Punch needle produces soft, raised loops of yarn that beg to be touched, while fuse beads offer crisp, glossy pixels that catch the light. By marrying the two, you get wall art that is both tactile and visually striking—a true conversation starter. This mixed media approach also opens up a world of creative possibilities. You can use fuse beads to outline shapes, add highlights, or even create entire focal points within a punched background. The beads act as a durable, dimensional element that won't flatten over time, while the yarn provides a cozy, organic backdrop. Whether you're a seasoned fiber artist or a bead enthusiast looking to branch out, this technique invites experimentation. Beyond aesthetics, the combination is practical. Punch needle projects can sometimes lack structure, but fuse beads provide a rigid framework that helps the piece hold its shape. Plus, if you're new to either craft, this is a forgiving way to practice—mistakes in one medium can be easily masked or incorporated into the other. For those just starting with beads, our beginner's guide offers a solid foundation before diving into this hybrid art.

Materials and Tools You'll Need

Before you begin, gather your supplies. For the punch needle portion, you'll need a punch needle tool (adjustable or fixed), monk's cloth or weaver's cloth (a sturdy, open-weave fabric), and worsted weight yarn in your desired colors. A embroidery hoop or frame will keep the fabric taut, which is crucial for even stitches. For the fuse bead element, you'll need midi or mini fuse beads, a pegboard (clear or colored), ironing paper, and an iron. Tweezers are handy for placing beads precisely. When selecting beads, consider their finish. Perler beads come in solid, translucent, glitter, and metallic varieties. Translucent beads can mimic the look of stained glass when backlit, while metallic beads add a touch of glamour. For a cohesive palette, our color guide can help you choose complementary hues that harmonize with your yarn. Also, think about bead size: mini beads allow for finer details, but midi beads are easier to handle and create a bolder pixel effect. For the base, you'll want a sturdy backing to support both the fabric and the beadwork. A wooden frame or a thick canvas panel works well. You'll also need a strong adhesive (like E6000 or a hot glue gun) to attach the bead elements to the fabric or frame. Finally, a good pair of scissors and a needle for any hand-sewing will round out your toolkit. If you're unsure about bead tools, our recommended tools guide covers all the essentials.

Step-by-Step: Creating Your Mixed Media Masterpiece

Start by designing your composition. Sketch your idea on paper, marking which areas will be punched and which will feature beads. Consider the flow of textures—perhaps beads form a geometric border or a central motif, while punch needle fills the background. Transfer your design onto the monk's cloth using a water-soluble marker or a light table. Remember that punch needle works from the back, so your design will be mirrored on the front. Next, stretch your fabric tightly in the hoop or frame. Thread your punch needle with yarn and begin punching following your pattern. Work in small sections, keeping your stitches close together for a dense, plush surface. Once the punched areas are complete, set the piece aside and move on to the beadwork. Arrange your fuse beads on the pegboard according to your design. For intricate shapes, use tweezers to place each bead. When ready, cover with ironing paper and iron according to the instructions in our ironing guide. Aim for a flat, fused piece that retains some flexibility. After the bead piece has cooled, carefully remove it from the pegboard. You can either sew it onto the fabric using a strong thread or attach it with adhesive. For a seamless look, stitch around the edges of the beadwork, catching the fabric beneath. If you prefer a more dimensional effect, leave the bead piece slightly raised by using a thick adhesive. Once attached, you can embellish further with embroidery stitches or additional small bead clusters. Finally, mount your artwork in a frame or display it as a textile piece. For more wall art inspiration, explore our wall art ideas.

Design Tips for Stunning Results

To make your mixed media piece truly shine, pay attention to color harmony. Choose a palette that ties the yarn and beads together—perhaps pick up a accent color from your yarn in the beads, or vice versa. Our color guide offers in-depth advice on combining hues. Also, consider scale: larger bead elements can overwhelm a delicate punch needle design, so balance is key. If you're using a complex bead pattern, keep the punched background simpler. Texture contrast is another powerful tool. Mix shiny metallic beads with matte yarn, or use fluffy yarn with smooth beads. You can also experiment with bead placement—cluster them for emphasis or scatter them like stars. For a cohesive look, repeat bead colors throughout the punched areas as small accents. Don't be afraid to incorporate other techniques. You might add embroidery stitches like French knots or couching to further blend the two mediums. If you're making a smaller piece, consider turning it into a coaster or a ornament instead of wall art. The possibilities are endless.

Finishing and Displaying Your Artwork

Once your piece is complete, give it a professional finish. If you've used a hoop, you can either leave it as is for a rustic look or frame it in a shadow box to protect the texture. For a fabric-mounted piece, consider sewing a backing fabric to hide the messy back and add stability. A simple running stitch around the edges works wonders. When displaying, keep the artwork away from direct sunlight to prevent yarn fading and bead discoloration. If hanging, use a sturdy frame with a glass front? Actually, glass can flatten the texture, so it's better to leave it exposed or use a shadow box. For more display ideas, check our wall art guide. Finally, don't forget to sign and date your work on the back—it's a point of pride and helps track your creative journey. With care, your fuse bead punch needle art will be a cherished piece for years to come.

Questions fréquentes

Can I use any type of yarn for punch needle?

Not all yarns are suitable. Worsted weight yarn is generally the best for beginners because it's easy to thread and creates even loops. Fingering weight yarn can be used with a smaller punch needle, but it may require more practice. Avoid fuzzy or novelty yarns as they can break or clog the needle. Always test a small sample first.

How do I attach fuse beads to punch needle fabric securely?

The most secure method is to sew the bead piece onto the fabric using a strong thread (like upholstery thread) and a sharp needle. Stitch around the perimeter of the beadwork, catching the fabric underneath. Alternatively, use a strong adhesive like E6000 or a hot glue gun, but ensure the glue is applied sparingly to avoid seepage. For a hybrid approach, you can sew through the holes in the beads if they are accessible.

What is the best way to clean a mixed media piece?

Avoid machine washing or submerging in water. For dust, use a soft brush or a vacuum with a brush attachment on low suction. If spot cleaning is needed, dab gently with a damp cloth and mild soap, but be careful not to rub the beads or soak the yarn. Always test in an inconspicuous area first.

Can I use mini fuse beads with punch needle?

Yes, mini fuse beads work well, especially for detailed designs. However, they require more precision and may be more time-consuming to place. Use tweezers and a fine-tip applicator. Keep in mind that mini beads create a finer pixel effect, so they pair nicely with delicate punch needle patterns.

Prêt à créer vos propres modèles ?

Ouvrir le créateur gratuit
Partager :