Menu

FuseBeads Hub © 2026

Fuse Bead Fridge Magnets: 20 Fun Designs to Brighten Your Kitchen

Create 20 adorable fuse bead fridge magnets! From food and animals to letters and seasonal themes, get step-by-step guidance, material lists, and pro tips.

Débutant5 min read de lecture

Why Fuse Bead Fridge Magnets Are the Perfect Small Project

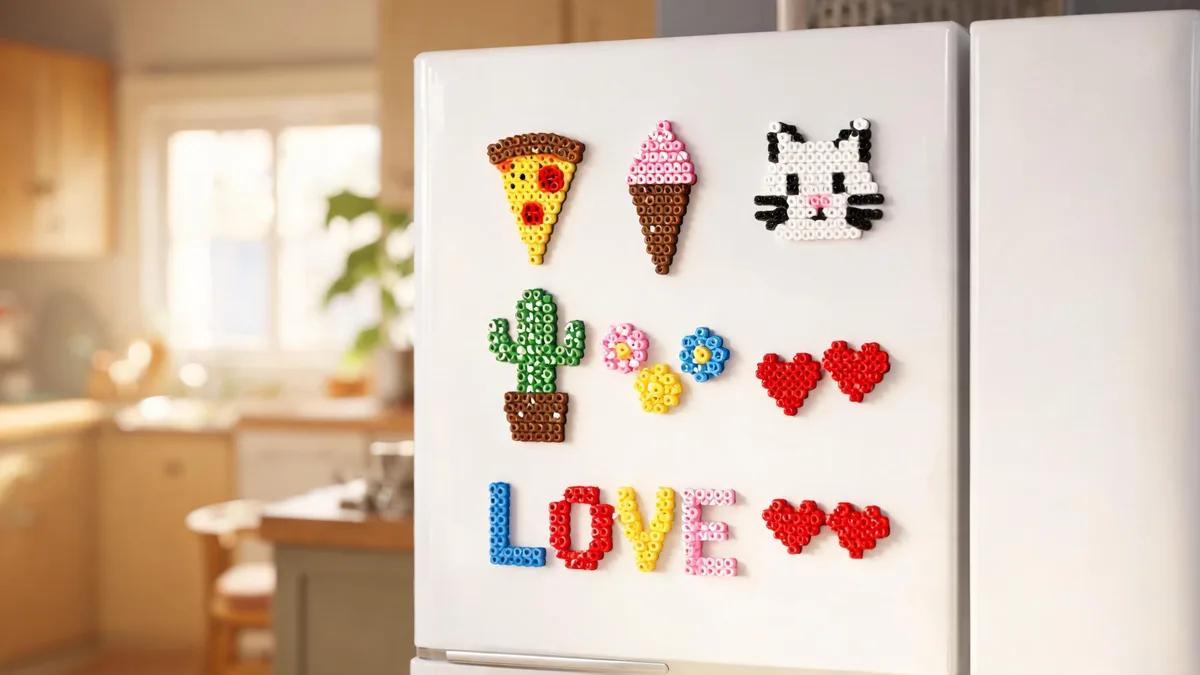
Fuse bead fridge magnets are one of the most satisfying small-scale projects in the pixel craft world. They require only a handful of beads, a small pegboard, and a few minutes of ironing, yet they deliver a charming, functional result you can admire every time you open the fridge. Unlike larger projects such as wall art or coasters, magnets let you experiment with color and design without committing to a big time investment. That makes them ideal for beginners who want to build confidence, and for experienced crafters who want quick, giftable makes. The appeal goes beyond convenience. Magnets are the perfect canvas for miniature pixel art: a tiny sushi roll, a smiling avocado, a monogram letter, or a snowflake. Because they are small, you can produce a whole set in an afternoon and mix and match themes. They also make wonderful handmade gifts for teachers, neighbors, and coworkers. If you enjoy making functional items, you might also like our Perler bead coasters or fuse bead ornaments — both share the same ironing fundamentals. In this guide, we'll cover the essential supplies, walk through the ironing and magnet-attaching process, and then present 20 design ideas across four popular themes: food, animals, letters, and seasonal. Along the way, we'll share tips to keep your magnets flat, sturdy, and beautifully fused.

Materials and Tools You'll Need

Before you start designing, gather your supplies. The good news is that fuse bead crafts require very little to get going. You'll need midi or mini fuse beads in your chosen colors — midi (5mm) is the standard size for most pegboards and is easiest for beginners to handle. A small square pegboard (typically 29x29 pegs) works well for most magnet designs, though you can use a larger board and make multiple magnets at once. If you're unsure which board to buy, our guide to the best fuse bead pegboards breaks down the options. For ironing, you'll need parchment paper (or the ironing paper that comes with many bead kits) and a household iron with adjustable temperature. A pair of tweezers is invaluable for placing tiny beads and removing mistakes. For the magnet itself, you'll need small self-adhesive magnetic dots or thin magnetic tape. We recommend magnets that are 10–15mm in diameter and at least 1mm thick for a secure hold. Strong neodymium magnets are great for heavier designs, but standard craft magnets are fine for small pieces. Optional but helpful tools include a bead scoop or sorting tray to keep colors organized, and a small cutting mat or ceramic tile to iron on. If you want a comprehensive rundown of tools that make the hobby easier, check out our recommended fuse bead tools. Finally, if you're crafting with children, review our fuse bead safety guide to ensure a fun and safe experience.
Materials and Tools You'll Need

Step-by-Step: How to Make a Fuse Bead Fridge Magnet

Making a fuse bead magnet is a straightforward process, but a few key steps ensure a professional-looking result. Start by selecting a design. You can sketch your own pixel pattern on graph paper, use a design from our cool ideas collection, or generate a custom pattern with our pattern generator. Once you have your design, count out the beads you need and arrange them on the pegboard, following your pattern. Work in small sections to avoid accidentally knocking beads over. When your design is complete, cover it with parchment paper and iron on a medium setting (no steam). Press the iron gently in circular motions for about 10–15 seconds, then lift the paper to check if the beads have fused. The beads should be melted enough to stick together but not so much that the holes disappear. If needed, iron a few seconds more. Let the design cool completely on the board before removing it — this prevents warping. Then flip the design over, cover it again, and iron the back side for another 10–15 seconds to ensure it's sturdy and flat. For a more detailed ironing tutorial, see our how to iron fuse beads guide. Once both sides are ironed and cooled, peel off the parchment paper. Attach your magnet to the back of the design using the self-adhesive backing. If your design is larger than your magnet, use two or three magnets spaced evenly for better support. Press firmly for 30 seconds. Your magnet is now ready to display! For a stronger bond, you can add a tiny dot of hot glue around the magnet's edge, but allow it to cool before attaching to the fridge.

20 Fun Designs: Food, Animals, Letters, and Seasonal Themes

Now for the fun part — the designs! We've organized 20 ideas into four categories so you can pick a theme or mix and match. Each design is small enough to fit on a standard square pegboard, and most use fewer than 100 beads. Food designs are endlessly popular because they're colorful and recognizable. Try a slice of watermelon with black seed beads, a smiling avocado half with a brown pit, a tiny sushi roll with white rice and orange salmon, a stack of pancakes with a butter pat, or a donut with rainbow sprinkles. These make cheerful kitchen decor and are great for a food-themed magnet set. For more animal inspiration, our animal ideas page has dozens of patterns you can adapt. Animal magnets are a hit with kids and adults alike. Create a round bumblebee with yellow and black stripes, a pink pig with a curly tail, a blue whale with a water spout, a green turtle with a patterned shell, or a red fox with a white-tipped tail. These designs often require a bit more detail, so use tweezers for precision. If you love making animal-themed crafts, you might also enjoy our 3D fuse bead tutorial for more advanced projects. Letter magnets are both practical and personal. Make a single initial for each family member, or spell out a short word like "YUM" or "HOME." Use a bold, blocky font for readability, and consider a contrasting border color to make the letter pop. You can also create numbers for birthdays or anniversaries. Seasonal magnets let you rotate your decor throughout the year. Design a red heart for Valentine's Day, a pastel egg for Easter, a jack-o'-lantern for Halloween, a snowflake for winter, or a tiny Christmas tree for the holidays. For more seasonal inspiration, see our fuse bead Christmas ornaments guide. With 20 designs in your repertoire, you'll never run out of ways to refresh your fridge.
20 Fun Designs: Food, Animals, Letters, and Seasonal Themes

Tips for Durable, Professional-Looking Magnets

To ensure your magnets last and look their best, pay attention to a few details. First, always iron both sides of your design. A single-sided iron can leave the beads fragile and prone to breaking. A fully fused piece is much stronger and will withstand regular handling. Second, choose the right magnet strength. Small, thin magnets may not hold heavier designs, especially if you use a lot of beads. Test your magnet on the fridge before finalizing; if it slides down, upgrade to a stronger magnet or add an extra one. Third, consider the finish. Some crafters like to apply a thin coat of clear sealant or Mod Podge to the front of their magnet to protect the colors from fading and to add a slight gloss. This is optional but can make your magnet look more polished. If you do seal, make sure the design is completely cool and dry before applying. Fourth, store your finished magnets carefully when not in use. Stacking them can scratch the beads, so keep them on the fridge or in a small padded box. Finally, don't be afraid to experiment with color combinations. Our fuse bead color guide can help you choose harmonious palettes. And if you enjoy making small, functional crafts, you might also like our fuse bead earrings and jewelry or fidget toys guides. With a little practice, your fridge will become a gallery of charming pixel art.

Questions fréquentes

What size fuse beads are best for fridge magnets?

Midi beads (5mm) are the most popular choice for fridge magnets because they are easy to handle and widely available. Mini beads (2.6mm) allow for finer detail but require more precision and are better suited for experienced crafters. Both work well; just make sure your pegboard matches the bead size.

How do I attach the magnet to the fuse bead design?

Use self-adhesive magnetic dots or thin magnetic tape. Peel off the backing and press the magnet firmly onto the back of your cooled, ironed design for 30 seconds. For extra security, especially on larger designs, add a small dot of hot glue around the edges of the magnet. Let it cool completely before using.

Can I make fridge magnets with kids?

Absolutely! Fuse bead magnets are a wonderful family craft. Children can help place beads and choose colors, while an adult handles the ironing. Always supervise ironing and keep the hot iron out of reach. For more safety tips, see our guide on whether fuse beads are safe for kids.

How many beads does a typical fridge magnet need?

Most small fridge magnets use between 30 and 100 beads, depending on the design's complexity and size. Simple shapes like a heart or letter may use fewer than 50, while detailed animals or food items might use closer to 100. It's a good idea to count out beads before starting to avoid running out mid-project.

Prêt à créer vos propres modèles ?

Ouvrir le créateur gratuit
Partager :